Creating a Simple Tilt Shift Effect in Unity URP
Published
The Tilt Shift Effect is actually a combination of 2 type of movements: the tilt, which is a rotation of the lens plane relative to the image plane, and the shift which is the movement of the lens parallel to the image plane (from Wikipedia). Using this effect allows a photographer to control the plane of focus.
This effect is of interest to us, because it is often used to create a “Miniature Faking” effect in photographs, also known as diorama illusion. Wikipedia gives a good explanation, but examples are worth a thousand words, look at the pictures below:


As you can see, this effect can be replicated by blurring the upper and lower part of an image in order to bring the center into focus. So how do we do this in Unity? Well, we’ll set up a Custom Renderer Feature in URP.
First, what’s a Custom Renderer Feature? The thing is that rendering occurs by layers. First a layer is rendered, then the next one etc until the whole scene is rendered. But what is great about Unity and the URP is that it easily enables us to set additional custom passes to this rendering process at any point: that’s what a custom renderer feature is. We’re basically getting the render texture at a given point of the rendering process, and applying our effect, and then letting Unity go on with its work.
So how do we set this up? Well, here is a great tutorial on how to implement a custom renderer feature. I highly recommend it as it explains a lot of things and that’s the code I use.
Then we’ll need a shader and a material to apply. Considering we are only applying our blur to the top and bottom part of our texture, we’ll create a mask depending on the amount of screenspace we want to blur.
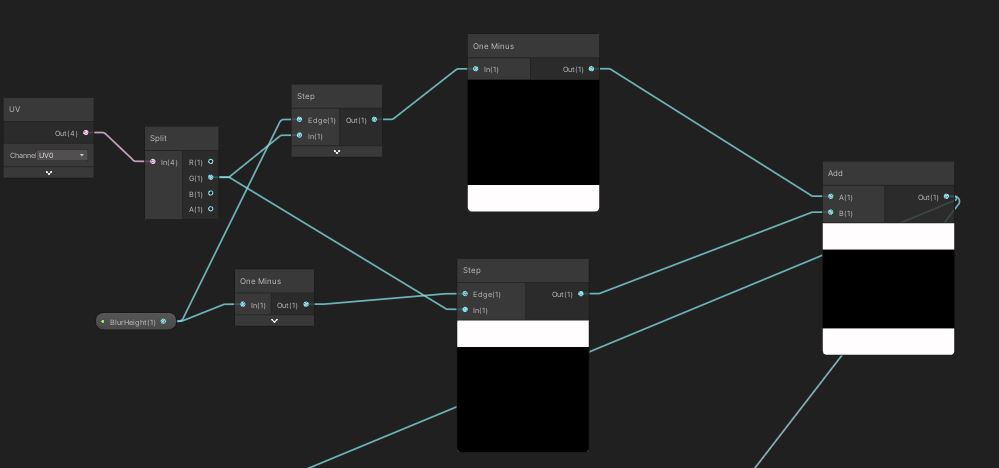
As for the blur, we’ll actually sample the input texture at different UVs. You only need to expose a blur strength propery (or call it blur radius), offset the UV using this value and sample your main texture and then compute the mean color.
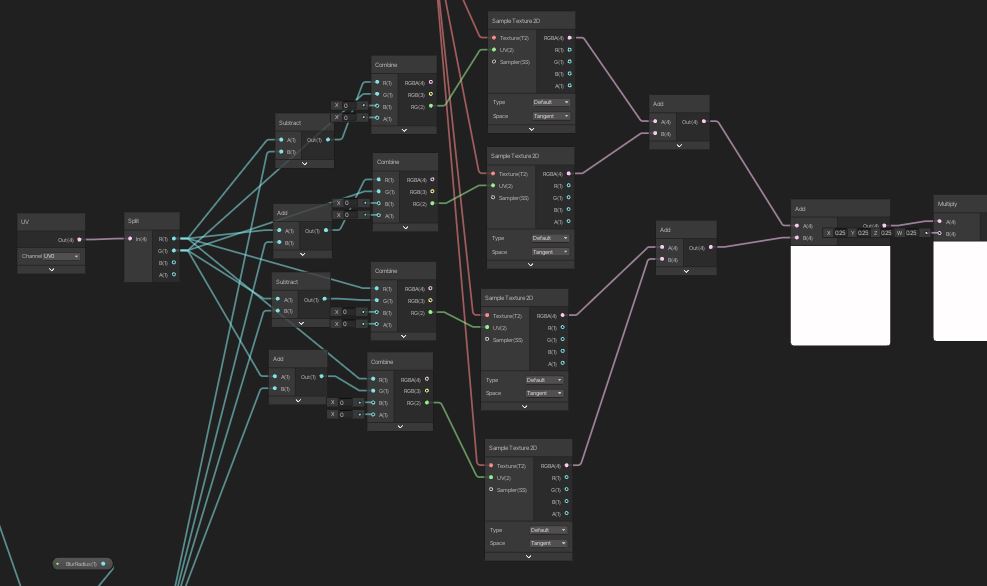
Finally you’ll need to lerp between the computed blurred texture and the input texture depending on the blur mask and output the result.
Once you’ve created this shader, the only remaining thing is to create a material, assign the shader to the material, and set the custom renderer feature as explained in the article shared above. Then you should have your blur on the top and bottom part of the screen, congrats!
A few things to note here. I just shared a barebones setup to simulate a tiltshift effect and there are a few issues:
- We are completely disregarding the depth of the scene and only blurring based on screen position, which might not be what you’re looking for
- The sampling for the blur is only done on 4 positions, you might want to sample more to increase the quality of the blur
- This setup creates a banding effect for the blur. It’s possible to implement an increasing blur based on y-coordinates (distance from center) to give a smoother appearance