How to Import a Tilemap or Tileset in Unity
Published
This article is a part of our 2D Platformer Tutorial Serie. Be sure to check the other articles!
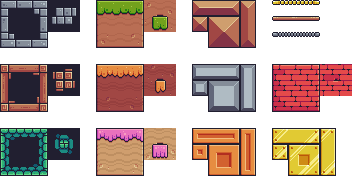
So, here we are about to make our game, and we’ve found a nice looking tilemap for our 2D platformer. But, what do we do? How do we turn this into something we can use in Unity? We’ll help you answer this one question: How to import a Tileset in Unity. Just follow the guide!
Import as Sprite
When importing an Image in Unity, we need to tell Unity what kind of resources we are importing. This allows Unity to transform the Raw Image into a Texture, something that it actually can handle appropriately.
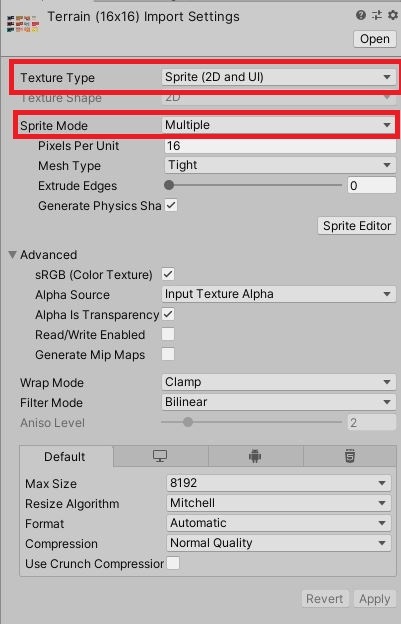
To do this, navigate in your Project folder and select the tilemap image you want to import. In your Inspector, there should now be Import Settings displayed. Since we are importing a Tilemap, we’ll need to set the Texture type to “Sprite (2D and UI), and the Sprite Mode to Multiple as shown in the Picture below.
Slicing the Tilemap
When importing a single Sprite you would follow the same instructions, except you wouldn’t set the sprite mode to multiple. So here, we have another step to follow: slicing the tilemap.
Click on Sprite Editor to open the Sprite Editor Window. If you get an error here, it is likely you didn’t create the project as 2D (most likely you used the URP project preset). Just open the Package Manager window, import the “2D Sprite” and the “2D TileMap Editor” and you should be good to go.
Go the Slice Menu in the Sprite Editor Window, and set Type as Grid by Cell Size. Now we can get started on extracting the tiles that make up our tilemap! If you are using proper resources you should already know the size of the tiles that make up your tilemap. Else, or if you don’t remember, you can just try it out different combinations. The most commons are 16x16 and 32x32.
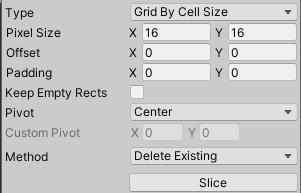
Our Tilemap uses 16x16 tiles, so all we need to do is to set cell size to 16x16, click “Apply” in the top right corner of the Sprite Editor Window and we are done!
Now, it is possible that the artist that created the tilemap you want to use introduced some padding and offset to the tilemap. It’s usually the case if you see a border around the map. In this case, you will need to play around with the offset and padding values until the grids line up nicely with the tiles.
Additional Tips
There are a few important tricks to know as well when importing a tilemap. In the Import Settings Panel of your Tilemap:
- set the “Pixels per Unit” value to the cell size you used when slicing the tilemap. This ensures your tile has a sensible size when painted on a grid.
- You should also set the filter mode as point instead of bilinear. Bilinear filtering tends to make the sprites blurry so I usually avoid it.
With this, you should have an understanding of how to load many resources, such as UI Elements, tilemaps and even single and animated sprites! Now we can get to creating our levels!
Anyway, that’s all on this topic for now, you can check out the other articles in the main project page here!