How to Make a Simple Patrolling Monster for a 2D Platformer in Unity
Published
UPDATE: Learn how to use Waypoints instead of raycasting for a more versatile patrolling system in this article: How to make a Patrolling System for Monsters and NPCs in Unity 3D.
This article is a part of our 2D Platformer Tutorial Serie. Be sure to check the other articles!
In this article, we’ll be creating an enemy for our 2D platformer in Unity, and implementing a simple behaviour: patrolling from wall to wall. While simple, this is widely used in platformers and other kind of games and the logic can be used in many situations.
Going from Right to Left
As this is part of our serie on making a platformer, grounded enemies can only go left or right.
Let’s create a new file for our script: “PatrollingWallToWall.cs”, and set some public properties for the movement speed, and whether the monster is going left or right. As they are public, we can set their values from the inspector, but we’ll also set some default values.
What’s more, since our enemies are sprites being displayed, we’ll need to have access to the SpriteRenderer component to flip the sprite when it turns around.
Finally, we’ll need our enemy to move. So, we’ll use the bIsGoingRight boolean to get the direction our ennemy is going, multiply it by the time elapsed and the monster’s movement speed. The result will be used as an input of the transform.Translate method to move our gameobject according to its movement speed and current direction.
We’ll put the logic of detecting walls and turning around in the CheckForWalls function, which we’ll explain in a bit, but for now our class looks like this:
public class PatrollingWallToWall : MonoBehaviour
{
    public float mMovementSpeed = 3.0f;
    public bool bIsGoingRight = true;

    private SpriteRenderer _mSpriteRenderer;

    // Start is called before the first frame update
    void Start()
    {
        _mSpriteRenderer = gameObject.GetComponent<SpriteRenderer>();
        _mSpriteRenderer.flipX = bIsGoingRight;
    }


    void Update()
    {
        // if the ennemy is going right, get the vector pointing to its right
        Vector3 directionTranslation = (bIsGoingRight) ? transform.right : -transform.right;
        directionTranslation *= Time.deltaTime * mMovementSpeed;

        transform.Translate(directionTranslation);


        //CheckForWalls();
    }
}
If you put this script on your Monster Game Object, it should move in one direction, great stuff! Now we can have our monster detect walls and turn around.
Turn Around, Vile Creature!
So how do we detect walls? Well, we want the enemy to turn around when it touches a wall, so we’ll be using the simple solution of raycasting.
Raycasting if you don’t know already, consists in creating a ray from an initial position, in a certain direction, for a finite or infinite distance and check for collisions.
The usability for our usecase is obvious: if the monster is going right, check for a collision at a short range. And if there is a collision, check if we are colliding with the ground. If we are, it’s to go back the way we came from! The code goes as follows and should be self explanatory:
    private void CheckForWalls()
    {
        Vector3 raycastDirection = (bIsGoingRight) ? Vector3.right : Vector3.left;

        // Raycasting takes as parameters a Vector3 which is the point of origin, another Vector3 which gives the direction, and finally a float for the maximum distance of the raycast
        RaycastHit2D hit = Physics2D.Raycast(transform.position + raycastDirection * mRaycastingDistance - new Vector3(0f, 0.25f, 0f), raycastDirection, 0.075f);

        // if we hit something, check its tag and act accordingly
        if (hit.collider != null)
        {
            if (hit.transform.tag == "Terrain")
            {
                bIsGoingRight = !bIsGoingRight;
                _mSpriteRenderer.flipX = bIsGoingRight;

            }
        }
    }
Also, we’ll need to add another propriety to our class, to define the raycasting casting distance to avoid our raycast colliding with the instantiator of the raycast (that is, we don’t want the ennemy to detect itself).
public float mRaycastingDistance = 1f;To revert the direction in which the monster is going, we are basically doing the same thing as in the Start method: change the value of bIsGoingRight, flip the Sprite, and let our Update loop take care of the rest. We’re done!
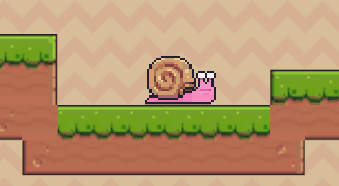
To Note: if you are paying attention, you will realize we also substracted Vector3(0f, 0.25f, 0f) in the raycast initial position. We do this to enforce raycasting at an appropriate level: our snail monster takes up almost 2 spaces in the Y axis, so if we raycasting from the Y position of the center of our sprite, we’ll miss the floor and our monster will be stuck going right and trying to find a collision.
Extending this Class
This is a very simple behaviour but what it really is, is a building block for more complex behaviours.
For example, you can modify the raycasting part to check whether the monster is about to fall with simple checks: if there is no ground at the bottom right of the monster, that’s a hole. Or it can be used for a more complex AI; imagine a magician, that would run away when the player comes too close! The appropriate behaviour can be started thanks to raycasting like we did above.
Anyway, that’s all on this topic for now, you can check out the other articles in the main project page here!
You can also get the code and the assets from this Github Repository.
Similar Articles
How to make a Patrolling System for Monsters and NPCs in Unity 3D
Adding Line of Sight Player Detection in Unity 3D