Easily Start a Server to Run a Unity Web Build in your Browser
Published
When building a Unity project for web, the process will output a HTML file as well as a Build folder, containing the WASM blob to be streamed to play the game.
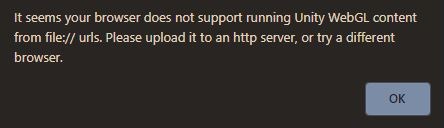
The problem here is that if you try to open the HTML you will be greeted by this nice little error message:
Right, so we need a server to run our game. So how do we do that? I’ll show you a few easy ways to do this, using your preferred tool between Python, Javascript or a browser extension.
Using Python
Now this is the most useful one in my opinion, as Python comes bundled with installs of Linux and Mac and odds are if you’re a dev you’re also using it as your preferred scripting language on Windows. It’s also used in Blender so, really, you’re likely to have a python install on your computer even if you don’t know it.
Python has a nice module called to create servers which is called http. It should be part of the standard library so you should already have it.
Now this package will allow us to run a very nice one-liner to create a server (assuming python is in your path). Navigate to the folder where your HTML file and the build folder are and open the command line. Then run the following command:
python -m http.serverThat’s all! This command should start a server and the first line should be “Serving HTTP on 0.0.0.0 port 8000 (http://0.0.0.0:8000/) …“. Now open your browser and go to “localhost:8000”. You game should be running properly!
To note:
- Users of Linux and Mac might have to use ‘python3’ instead of ‘python’ in the instruction.
- After http.server, you can actually set the port on which you’d like to run the server, in case the default 8000 is busy.
Using Javascript
This can be extremely simple. Assuming you have npx installed (npm install -g npx), you can use these instructions:
npx http-server [path] [options]npx will automatically install the needed dependencies and start the server. If you current working directory is where your files are located, ‘npx http-server’ is all you need. You can change the port with the ‘-p’ flag if needed.
Using a Chrome Extension
One last possibility is to use an extension. A simple one to use is “Web Server for Chrome”.
When starting it you should get the following menu:
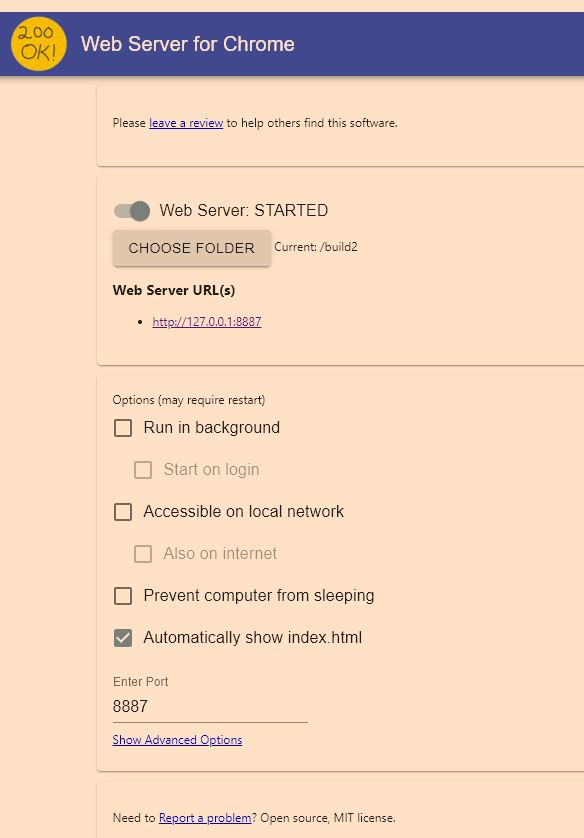
Once again this is pretty straightforward: you can choose the folder to serve, the port and whether to automatically return index.html when connecting.
With this, you should have all you need to run your web build in your browser. I haven’t tried any Firefox or Opera extensions, but an equivalent shouldn’t be hard to find. Have fun testing your builds!