How to Create a Simple and Reusable Character Controller for a 2D Platformer in Unity
Published - Last modified
This article is a part of our 2D Platformer Tutorial Serie. Be sure to check the other articles!
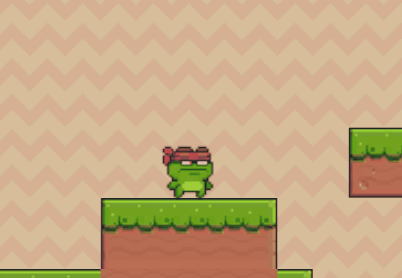
In this article, we’ll be implementing a Simple and Reusable 2D Character Controller for our platformer that can move around and jump.
What is a State Machine
The first thing you should do when writing a script to handle player movement, is to first define the allowed movements. By this, I mean: can a crouched player jump? Are double jumps allowed?
A common way to model this kind of restriction is through the creation of a State Machine: at any point in time, the player is in a given state, which defines what a given input will trigger. For example, pressing the spacebar while standing would make the player jump while this it would have no effect when the player is crouched down.
For our tutorial, we will be using this system, as I think it meshes well with another feature: Character Animation.
Now, let’s get started on the implementation!
Implementing states and transitions for our State Machine
These are the 3 states will be implementing, and the logic will go as follows:
- If the player is not pressing any of the left,right or up key, and the player is on the ground, then the player is IDLE.
- If the player has not pressed the up key but the left or right key is being pressed, the player is RUNNING.
- If the player has pressed the up key, it gets into the JUMPING state and cannot jump again until it touches the ground. When the playertouches the ground, its state switches back to IDLE or RUNNING depending on currently pressed keys.
We’ll create our PlayerController script, and give it some initial properties:
public class PlayerController : MonoBehaviour
{
    public CharacterState mPlayerState = CharacterState.IDLE;

    [Header("Movement Settings")]
    public float mSpeed = 5.0f;
    public float mJumpStrength = 10.0f;


    // Setting the animated sprites for the different states
    [Header("State Sprites")]
    public RuntimeAnimatorController mIdleController;
    public RuntimeAnimatorController mRunningController;
    public RuntimeAnimatorController mJumpingController;


    // We'll be caching the animator component to easily change current player animation
    private Animator _mAnimatorComponent;

    // Tracking the direction our player is going
    private bool _bIsGoingRight = true;
    private bool _bPlayerStateChanged = false;


    void Start()
    {
        _mAnimatorComponent = gameObject.GetComponent<Animator>();
        _mAnimatorComponent.runtimeAnimatorController = mIdleController;
    }
}
Now, we’ll seperate our State Machine in 2 parts: the movement part, and the state changes.
Implementing state changes in the PlayerController
At the beginning of our Update Method, we check for changes in the player state according to what we described in the previous section. I usually try to give descriptive names to all my variables, so the next section should be self-explaining.
If you pay attention, you’ll see that while I said the actual movement stuff would be handled later, it turns out I am accessing the RigidBody2D component of my character and setting a velocity when the player enters the jumping state. This is because while the movement handling afterwards handles the movement of the player WHILE it is in its current state, the jump must occur WHEN the jump input is registered so this is the easiest way to handle it.
void Update()
    {

        _bPlayerStateChanged = false;
        // check state changes
        if (mPlayerState == CharacterState.IDLE)
        {
            if (Input.GetKey(KeyCode.RightArrow) || (Input.GetKey(KeyCode.LeftArrow)))
            {
                _bPlayerStateChanged = true;
                mPlayerState = CharacterState.RUNNING;
                if (Input.GetKey(KeyCode.RightArrow))
                {
                    _bIsGoingRight = true;
                }
                else
                {
                    _bIsGoingRight = false;
                }
            }
            else if (Input.GetKey(KeyCode.UpArrow))
            {
                gameObject.GetComponent<Rigidbody2D>().velocity = transform.up * mJumpStrength;
                _bPlayerStateChanged = true;
                mPlayerState = CharacterState.JUMPING;
                StartCoroutine("CheckGrounded");
            }
        }
        else if (mPlayerState == CharacterState.RUNNING)
        {
            if (Input.GetKey(KeyCode.UpArrow))
            {
                gameObject.GetComponent<Rigidbody2D>().velocity = transform.up * mJumpStrength;
                _bPlayerStateChanged = true;
                mPlayerState = CharacterState.JUMPING;
                StartCoroutine("CheckGrounded");
            }
            else if (!Input.GetKey(KeyCode.RightArrow) && (!Input.GetKey(KeyCode.LeftArrow)))
            {
                _bPlayerStateChanged = true;
                mPlayerState = CharacterState.IDLE;
            }
        }
    }
Additionally, there is no way for the player to give inputs that would take the character out of the Jumping state in order to prevent infinite consecutive jumps.
What we do here is we start a Coroutine that checks whether the player is back on the ground after its jump. Once it has, the state is changed back to Idle or Running, and the Player can now jump again.
    IEnumerator CheckGrounded()
    {
        yield return new WaitForSeconds(0.5f);

        while (true)
        {
            RaycastHit2D hit = Physics2D.Raycast(transform.position - Vector3.up * 1f, -Vector2.up, 0.05f);
            if (hit.collider != null)
            {
                if (hit.transform.tag == "Terrain")
                {
                    if (Input.GetKey(KeyCode.RightArrow) || Input.GetKey(KeyCode.LeftArrow))
                    {
                        mPlayerState = CharacterState.RUNNING;
                    }
                    else
                    {
                        mPlayerState = CharacterState.IDLE;
                    }
                    break;
                }
            }

            yield return new WaitForSeconds(0.05f);

        }

        ChangeAnimator();
        yield return null;
    }
Handling keyboard inputs in PlayerController
Now that we have set the appropriate state for our character, we can detect the inputs and move our character very easily. The code should speak for itself here:
void Update
{
    ... // State Changes code


    if (mPlayerState == CharacterState.JUMPING || mPlayerState == CharacterState.RUNNING)
    {
        if (Input.GetKey(KeyCode.RightArrow))
        {
            _bIsGoingRight = true;
            transform.Translate(transform.right * Time.deltaTime * mSpeed);
        }
        else if (Input.GetKey(KeyCode.LeftArrow))
        {
            _bIsGoingRight = false;
            transform.Translate(-transform.right * Time.deltaTime * mSpeed);
        }
    }
}
Changing the Animation on current state changes
The actual animation is handled by the animation controllers, so we are in effect just swapping the controllers we specified as properties of our character controller script.
We’ll also be checking the direction where our player is going, and flipping the sprite accordingly!
    public void ChangeAnimator()
    {
        RuntimeAnimatorController newAnimator = mIdleController;

        if (mPlayerState == CharacterState.RUNNING || mPlayerState == CharacterState.JUMPING)
        {
            newAnimator = mRunningController;
            if (_bIsGoingRight)
            {
                gameObject.GetComponent<SpriteRenderer>().flipX = false;
            }
            else
            {
                gameObject.GetComponent<SpriteRenderer>().flipX = true;
            }
        }

        gameObject.GetComponent<Animator>().runtimeAnimatorController = newAnimator;
    }
Conclusion
We now have a functionnal player character, that implements restriction on jumping and switches from an Idle to Running animation when appropriate, and vice-versa. That’s great stuff!
If you’d like to create a crossplatform movement system, that could handle keyboard inputs, clicks and touchscreen I recommend taking a look at the movement system articles of my DungeonDiver Project.
Anyway, that’s all on this topic for now, you can check out the other articles in the main project page here!
You can also get the code and the assets from this Github Repository.