Dungeon Diver - Creating Walls
Published
In the previous articles, we created a movement system for our game. But as it is, our entire world is made up of a plane object (the ground) and one cube (our player). That’s not much fun, so let’s see how we can start building up our world! And the first thing we’ll do is create a maze. Ready? Let’s roll!
To see it in action, click on the demo link above.
I recommend looking up the resources on Github while reading the article, as not all the code is written down here: just follow this link.
Prefabs: A Gamedev’s Favourite Tool
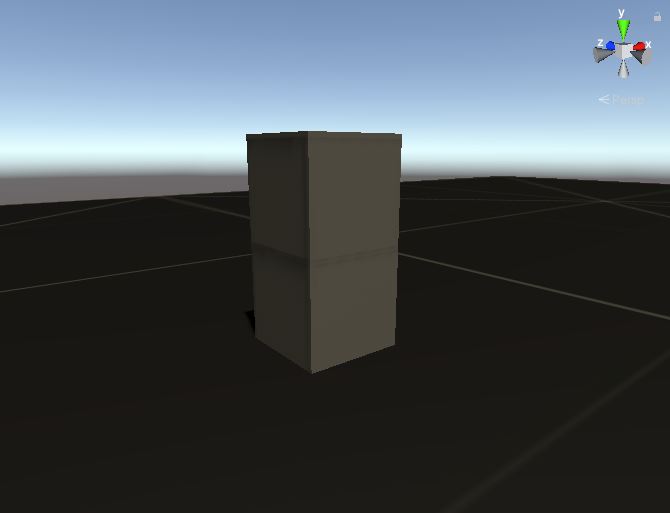
To create our maze, we’ll need walls, lots of them. Our focus is on implementing game system fast, so we’ll go with simple cubes. Right-click the inspector, 3D Object, Cube to create a cube. Set this cube in contact to the floor, then create another one and set it on top of the other. Voila, we’ve got our wall!
This is nice and all, but this means that you would have to do this every time you want to create another wall: create a cube, set it at a certain coordinate, create another cube, put it on top of the previous one… Very dull, extremely repetitive.
Thankfully Unity provides us with a solution! First, create an empty element in your Hierarchy and put the 2 cubes inside it. Then, create a new Prefab folder in your Assets folder, if you don’t already have one and navigate inside. Now select your element containing the 2 cubes and drag and drop it inside the Prefab folder.
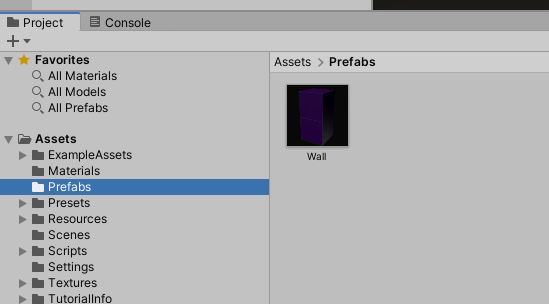
By doing this, you have created a prefab of an object, basically a model that you can reuse anytime you want while developping your scene. Prefabs are great to use, because whenever you modify a prefab, all the copies of it will be modified. It helps you avoid some repetitive work that you would otherwise have to do: try to select your prefab, drag and drop it somewhere in your scene; you now have another wall!
Using prefabs is also great for what is called Procedural Generation, which means to create Game Content, such as levels, through the use of an algorithm. We will talk about Instantiation and Procedural Generation in the next article.
Wait A Second, These Walls Aren’t Solid!
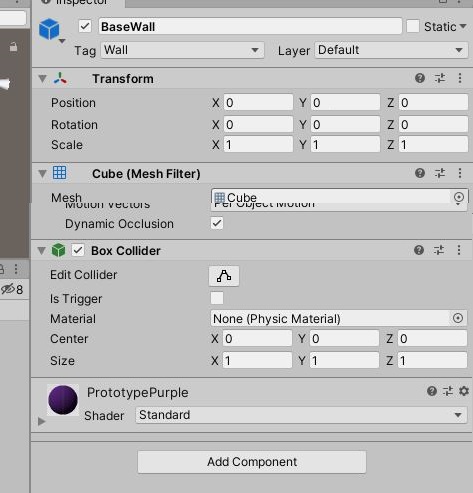
After placing some walls, you might try to play in the scene but you’ll quickly realize that you can go through the walls. By default, objects in Unity are not solid and require additional components so that a player cannot just go through them. In our case, we’ll add a box collider to both cubes making up our wall segment.
Since our walls objects now have a box collider we can detect if there is a wall in front of our player through Raycasting.
Raycasting means to create an invisible ray from a starting point of origin, in a certain direction for a given distance and is used to detect the presence of objects if the ray intersects with something. Raycasting can, for example, be used to detect whether the player is standing on the ground, or even for AI in stealth game to check if the player is within the range of vision of an ennemy.
In our case, we stick with a simple use case: check if there is a wall in front of our player. If the ray intersects with an object within a distance of 1 unit, it means there is a wall and the player cannot go forward.
We can implement this simply with a public method which returns true if the player can go forward, and false if there is a wall ahead. This will need to be called before the player actually moves forward.
 // use the GameObject which needs to perform the Raycast as input
public bool CanMoveForwardGameObject(GameObject targetCheck)
{
    // Checking if wall or obstacle with raycasting
    RaycastHit hit;
    if (Physics.Raycast(targetCheck.transform.position, targetCheck.transform.forward, out hit, 1.0f))
    {
        Debug.Log("there is something, cannot go forward!");
        return false;
    }

    return true;
}
The Need for Intermediary Layers
In our case, we accept both controls from our keyboard and from clickable arrows, that means we need to ensure that both check for the presence of a wall before trying to move forward. What’s more we may decide to add more checks in the future so it is usually good practice to limit the number of points where we have to perform these kind of checks.
For DungeonDiver, this means I created a new Script, PlayerInputController, which basically does the same thing as our previous PlayerController script except it exposes a function to handle player input, instead of having it in its Update loop. This means that function is now callable from our ClickableArrows (if we modify them a bit) and that the wall check will be performed for both keyboard and UI inputs.
I also created a GameController, in order to seperate the inputs handling from the actual game state management. Since we are creating a per-turn game, we have to handle the scheduling of events ourselves, so the GameController will be a major part of our project. For now it is pretty simple:
using UnityEngine;

public class GameController : MonoBehaviour
{
    private GameObject _Player;

    private bool _WaitingForPlayerInput;
    public bool WaitingForPlayerInput
    {
        get
        {
            return _WaitingForPlayerInput;
        }
        private set
        {
            _WaitingForPlayerInput = value;
        }
       }

    // Start is called before the first frame update
    void Start()
    {
        _Player = GameObject.FindGameObjectWithTag("Player");
        _WaitingForPlayerInput = true;

    }


    public void RotateGameObject(Directions direction, GameObject targetRotation)
    {
        if (direction == Directions.Left)
        {
            targetRotation.transform.forward = -targetRotation.transform.right;
        }
        else if (direction == Directions.Backward)
        {
            targetRotation.transform.forward = -targetRotation.transform.forward;

        }
        else if (direction == Directions.Right)
        {
            targetRotation.transform.forward = targetRotation.transform.right;

        }

    }

    public void RotatePlayer(Directions direction)
    {
        RotateGameObject(direction, _Player);

    }


    public void MoveForwardGameObject(GameObject targetTranslation)
    {
        targetTranslation.transform.Translate(new Vector3(0f, 0f, 1f));

    }

    public void MoveForwardPlayer()
    {
        MoveForwardGameObject(_Player);
    }

    public bool CanMoveForwardGameObject(GameObject targetCheck)
    {
        // Checking if wall or obstacle with raycasting
        RaycastHit hit;
        if (Physics.Raycast(targetCheck.transform.position, targetCheck.transform.forward, out hit, 1.0f))
        {
            Debug.Log("there is something, cannot go forward!");
            return false;
        }

        return true;
    }

    public bool CanMoveForwardPlayer()
    {
        return CanMoveForwardGameObject(_Player);

    }

    public void Restart()
    {
        _Player.transform.SetPositionAndRotation(new Vector3(0f, 0.5f, 0f), Quaternion.identity);

    }
}
Now, if you try going around, the player should not be able to go through walls, and if you try to do it messages should pop up in the Editor’s console. Nice job!
The Next Step
We now have a Player that can move, and walls that cannot be traversed, things are looking good. Next up, I’ll show you how you can create a level procedurally, which means, in our case, instantiating walls to create a Maze.